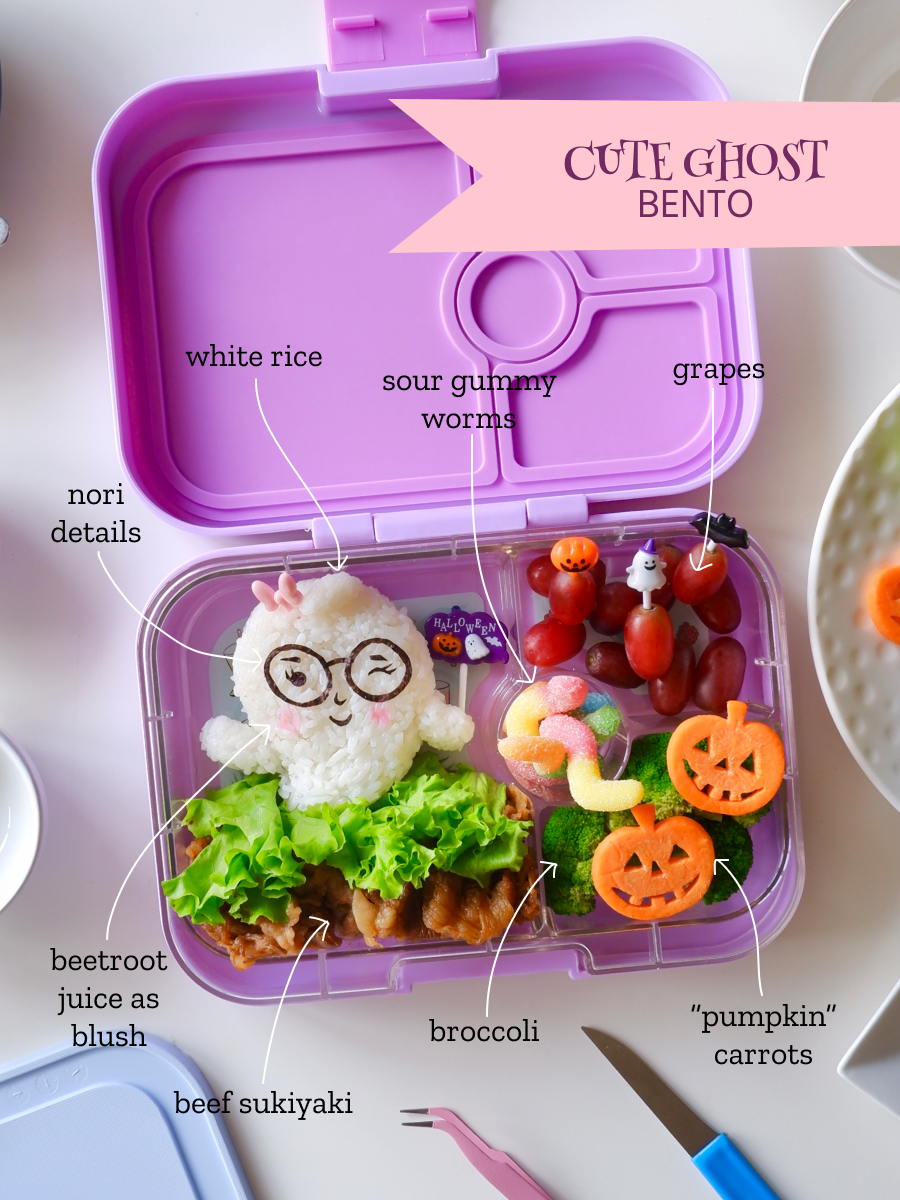
It’s almost Halloween, and I’m sharing the cutest little ghost that I packed in Zoë’s lunchbox last week. Because you gotta look boo-tiful, even if it’s spooky season, right? 
Come take a bite of this Cute Ghost Bento!
Face-to-face school is finally back on, so that means I’m also back to packing lunches for Zoë. I missed making character bentos the past two years (hello, pandemic and online classes!), so I’ve been making more bentos for her lately. To get her into the spooky spirit, I made this hauntingly cute surprise in her Yumbox.
How I Made the Cute Ghost Rice:
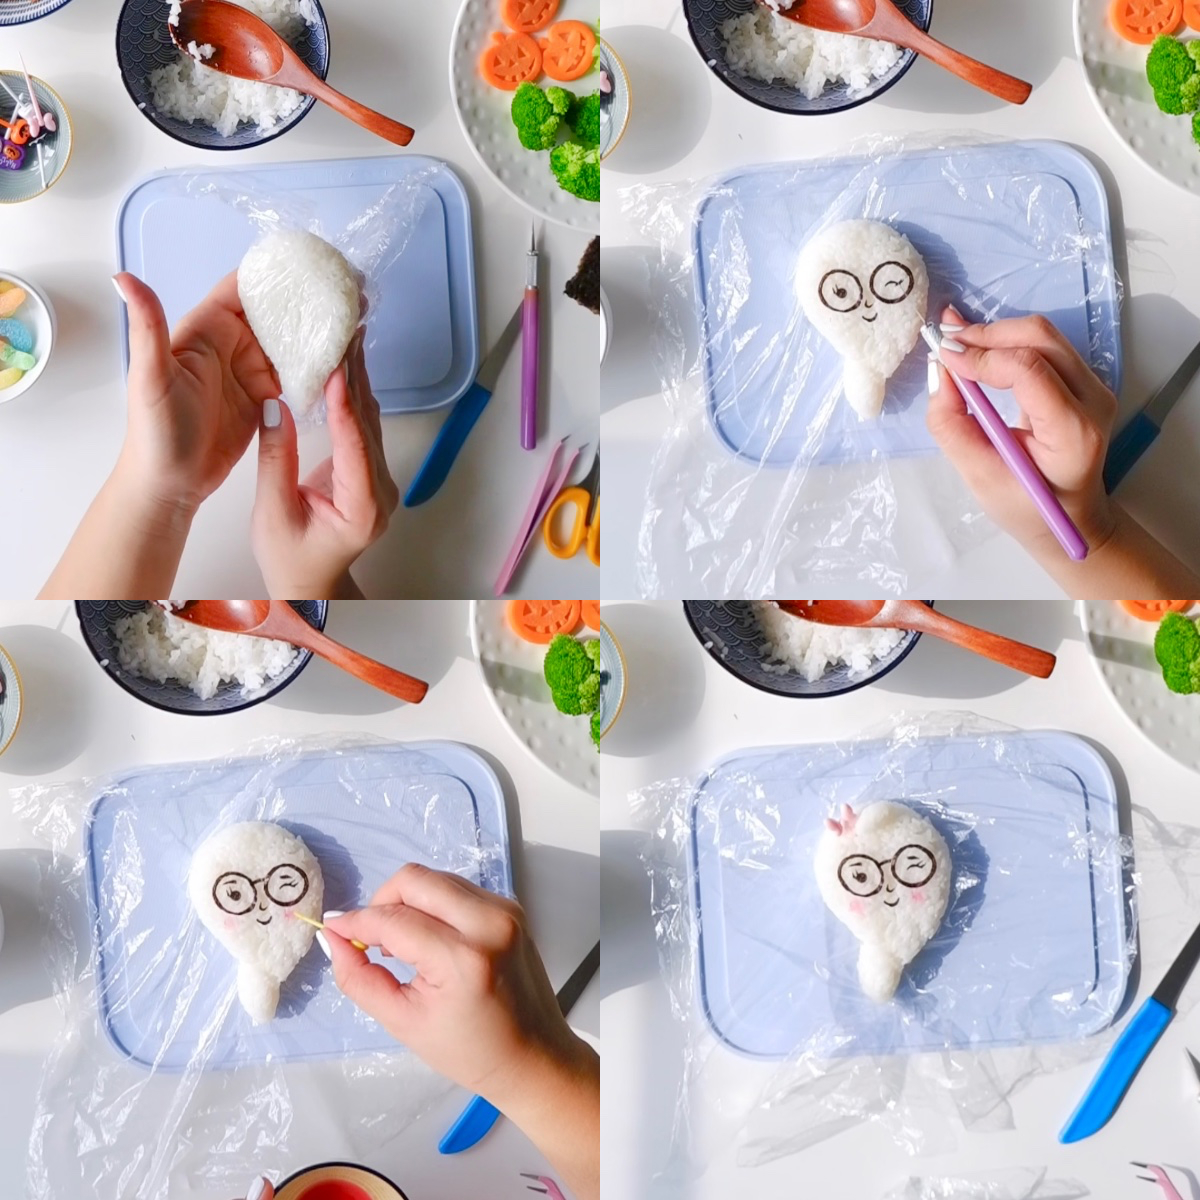
Step 1: Shape the Rice
To start off, I scooped some cooked white rice and shaped it into a little ghost. I used cling wrap to prevent the rice from sticking to my fingers. Once the rice is inside the cling wrap, it’s pretty easy to mold and shape. Kind of like molding play dough, really.
Step 2: Add the Nori Details
I used nori (roasted seaweed) for the face details. Using my handy tiny scissors, I cut out the shapes one by one. This usually takes the longest, so a little patience is always needed. I then assembled everything on the rice, using bento tweezers or a craft knife.
Step 3: Add Blush and Hair Bow
To give the ghost rice a flushed and finished look, I added some blush by dabbing on some beetroot juice on the cheeks, then inserted a bow food pick on top of its head. The cutest!
Done and ready to assemble!
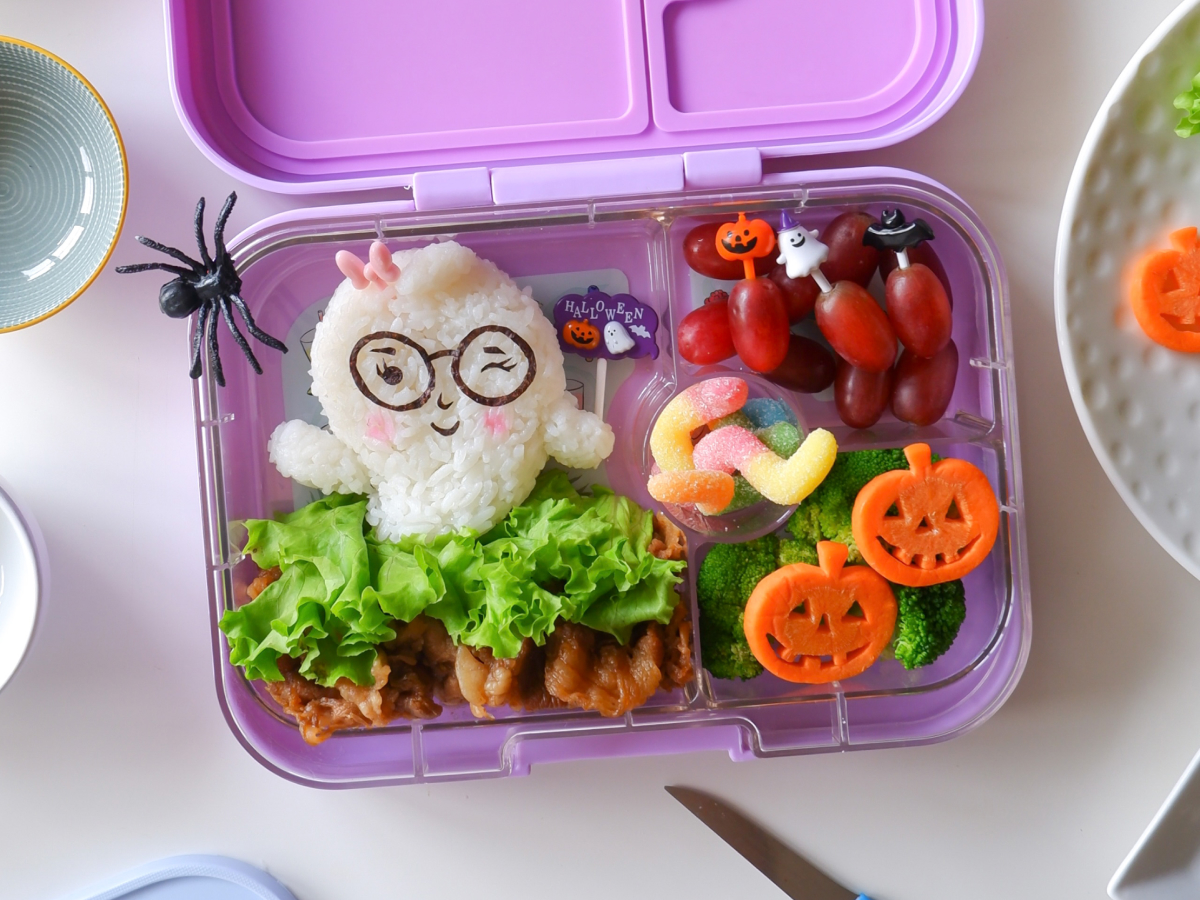
To complete the look, I gave the ghost some arms and a little Halloween banner food pick.
I packed the cute ghost rice on a bed of lettuce and a serving of Zoë’s favorite beef sukiyaki. For the sides I added steamed broccoli, “pumpkin” carrots (which I carved by hand), some grapes, and a couple of sour gummy worms.
Yum! What a spooktacular treat!
I made a quick Instagram Reel making this bento. Check it out here.
For more of my food art and bento creations, check out #foodartbyannings on Instagram.
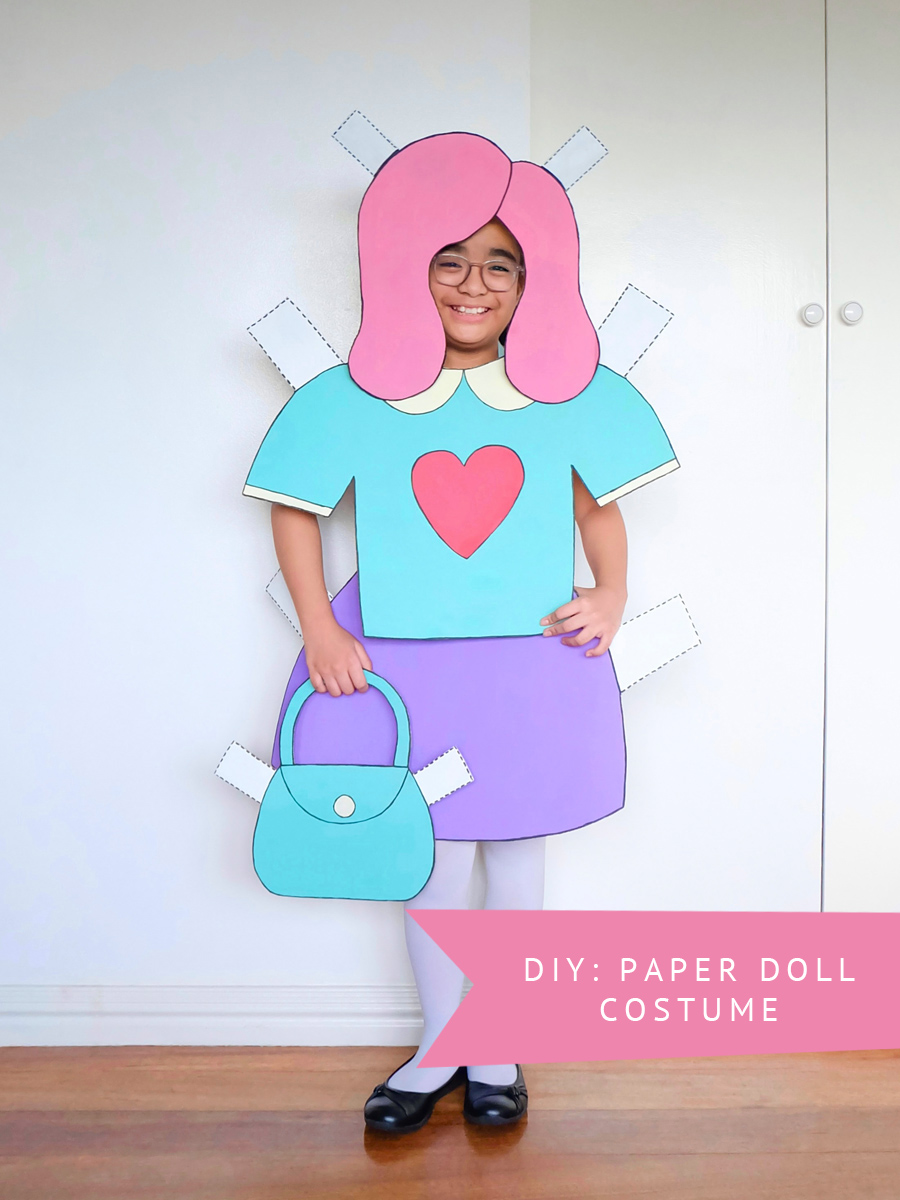
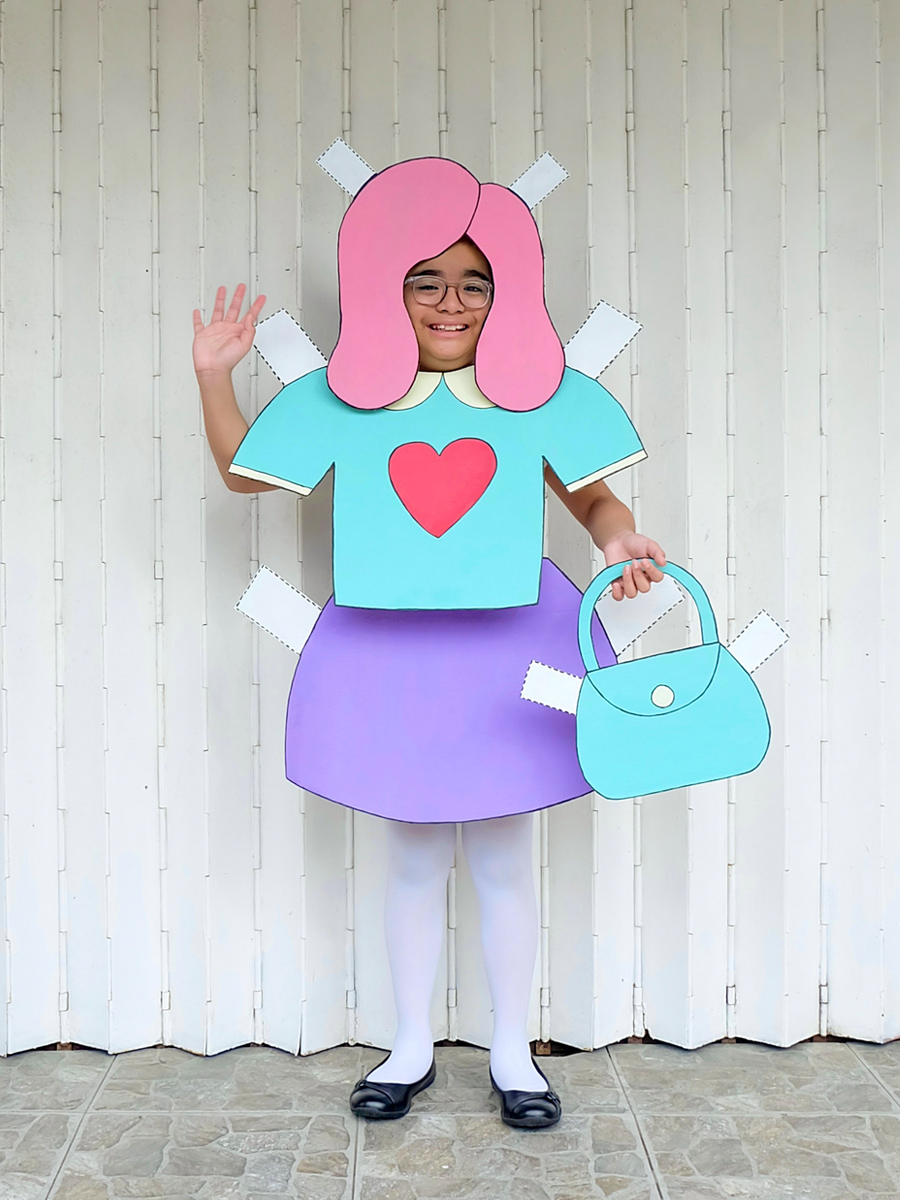
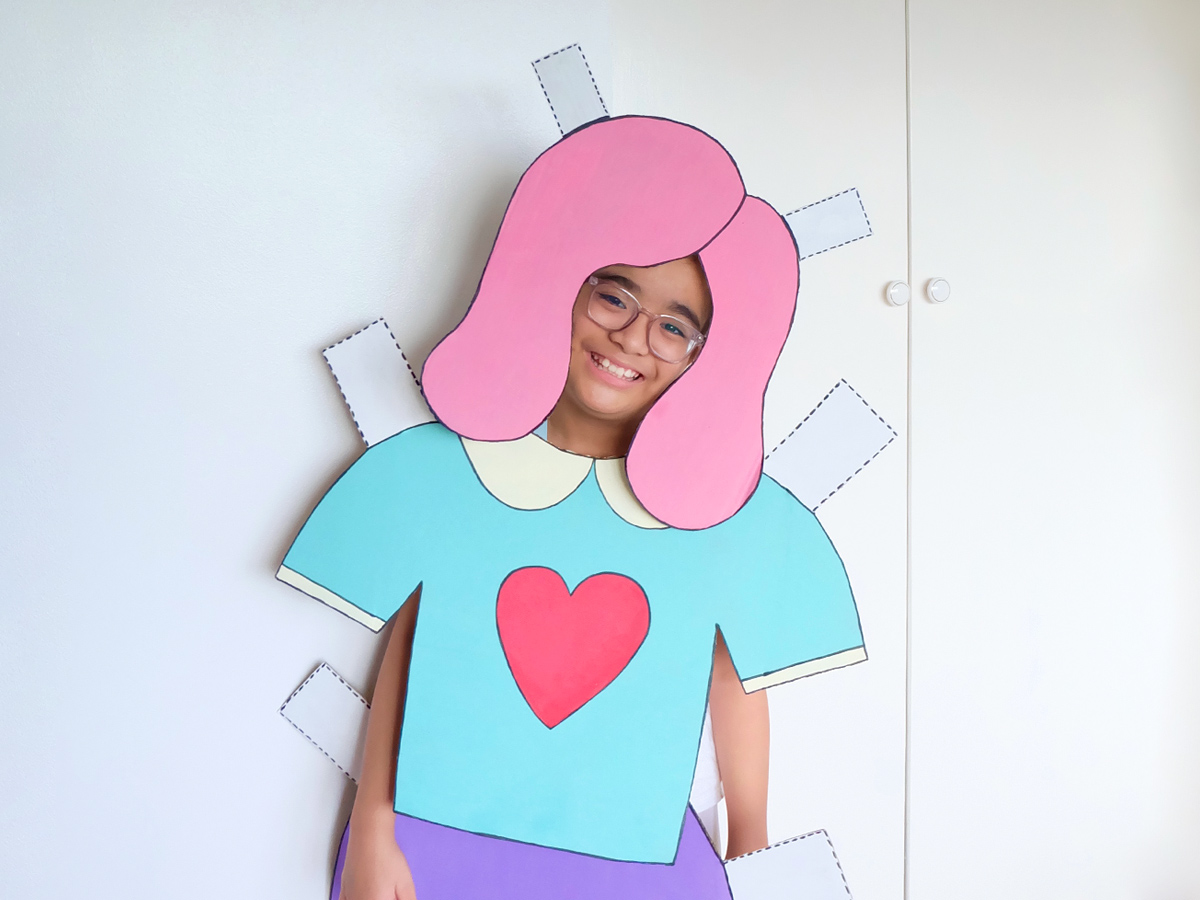
]]>This year, we’re making it fashionable! Zoë wanted to look colorful, pretty, and fab, so we made sure to get her all dolled up in a DIY Paper Doll Costume.
Check it out!
 This paper doll costume is inspired by Zoë’s very own paper doll creations.
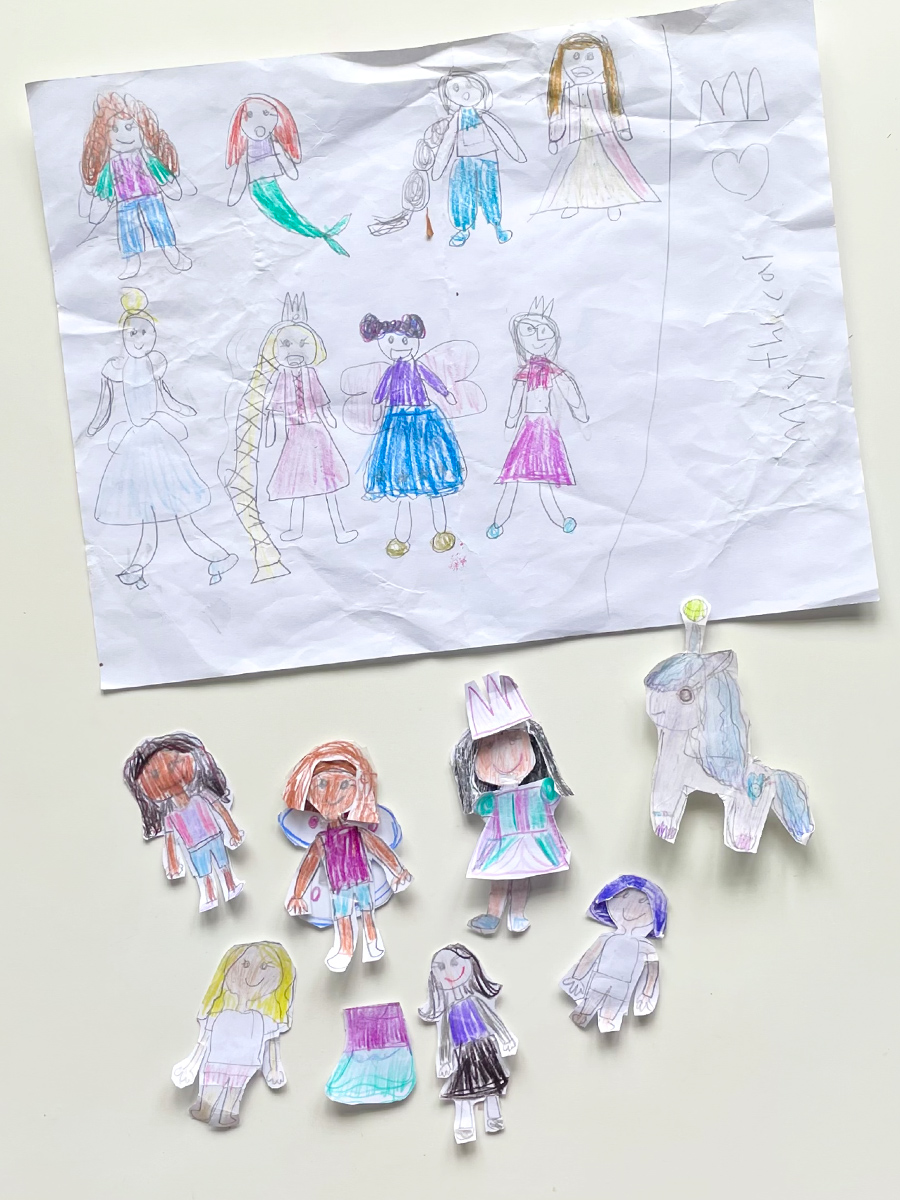 Zoë loves making paper dolls. She draws, colors, and styles them up, then narrates stories of adventure with them. The ones pictured above are just a few that she’s made over the years. I figured it was time to finally turn her into one of her creations, so this year’s paper doll costume was definitely the right fit!
Honestly, I was convinced that Zoë was done with our yearly DIY costume tradition, so I had no plans of making anything. She was already set on just wearing a Disney Princess costume, but when her friends started talking about Halloween a few weeks ago, she finally put her DIY thinking cap on. You can bet I was happy that she changed her mind—I don’t think I’m ready to let go of our Halloween tradition just yet. Plus, I was really itching to get my hands crafting. 😀
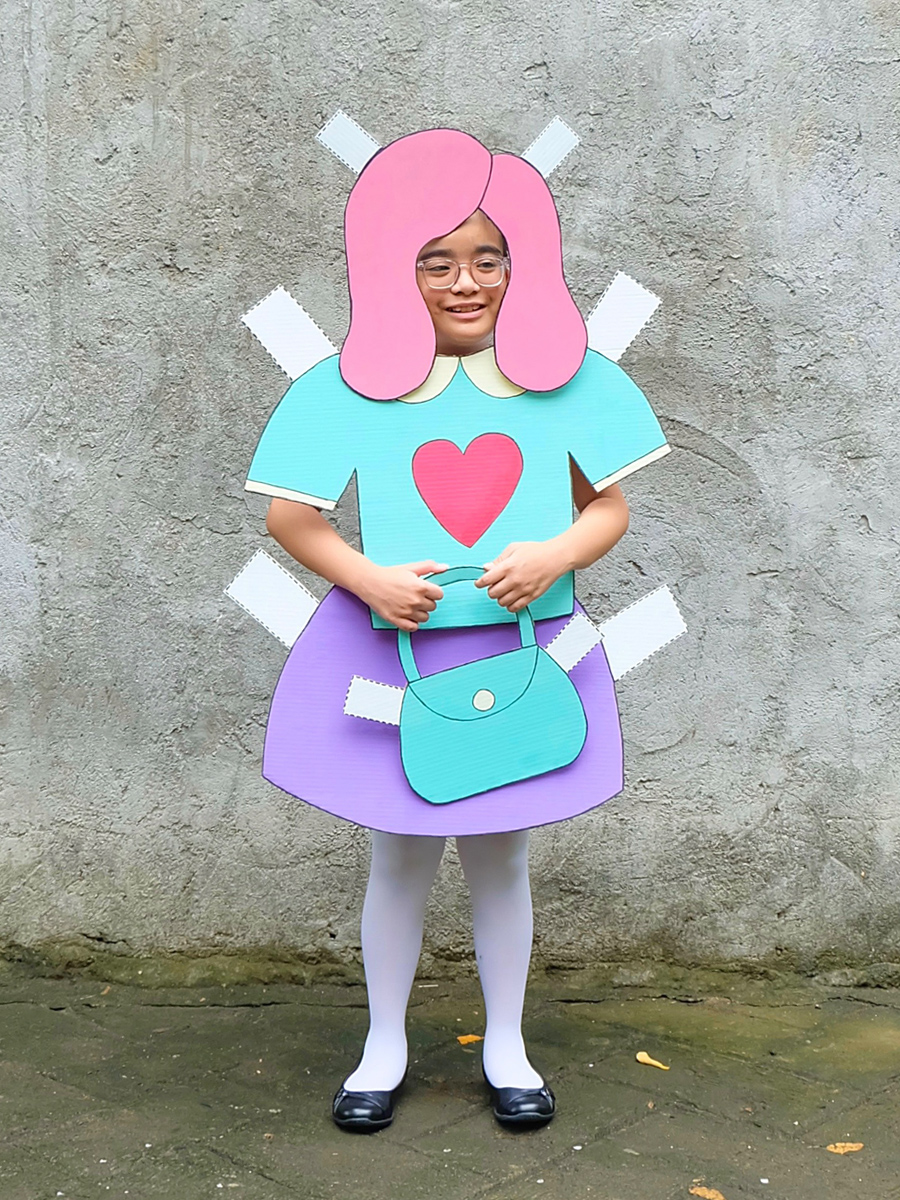
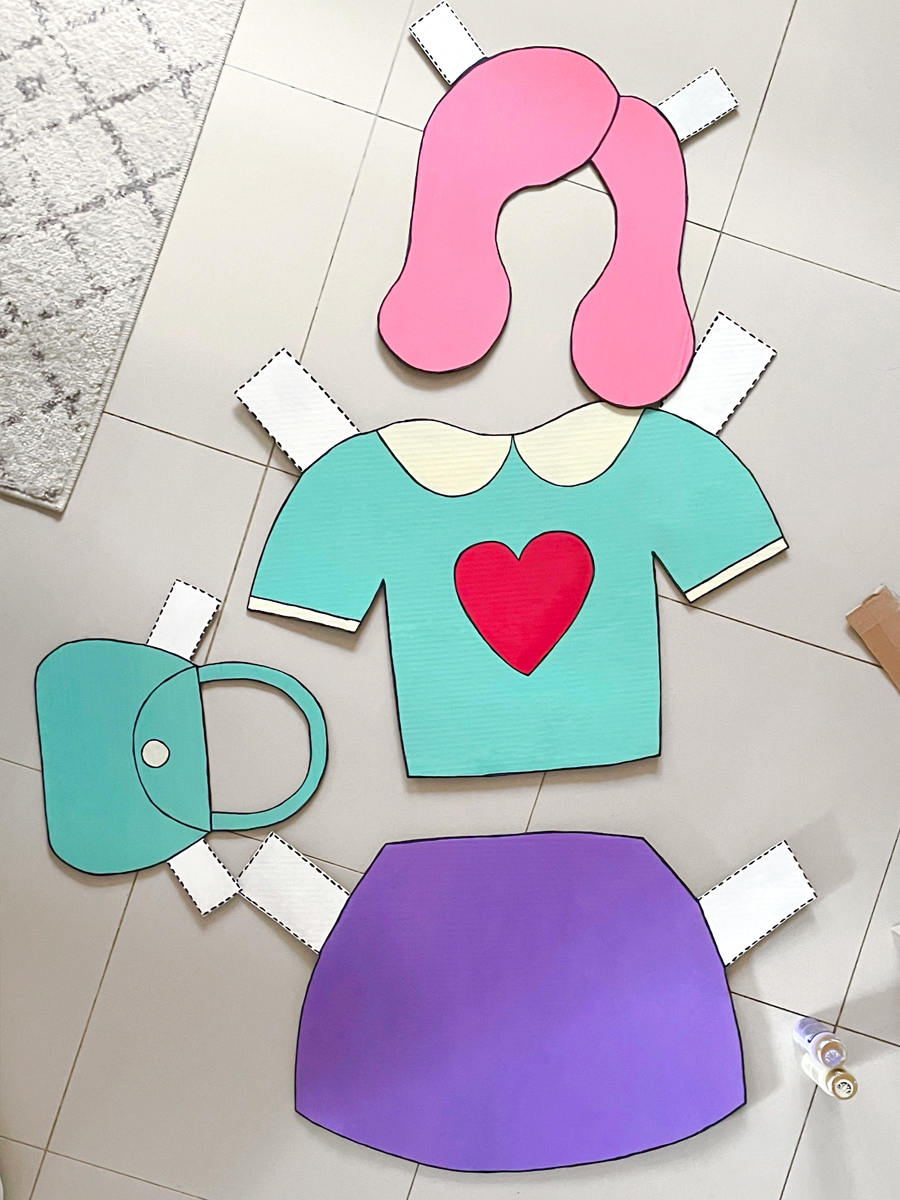 Constructed using minimal materials (an old Ikea cardboard box, an old headband, ribbon, and paint), this paper doll costume is probably the easiest DIY I’ve made. I completed everything in less than two days. This four-piece ensemble was a pretty simple craft of drawing, cutting, and painting. All Zoë asked for was to use her favorite colors, add a heart on the shirt, and give her bright pink hair. Cute, colorful, and girly, just the way she wanted it!
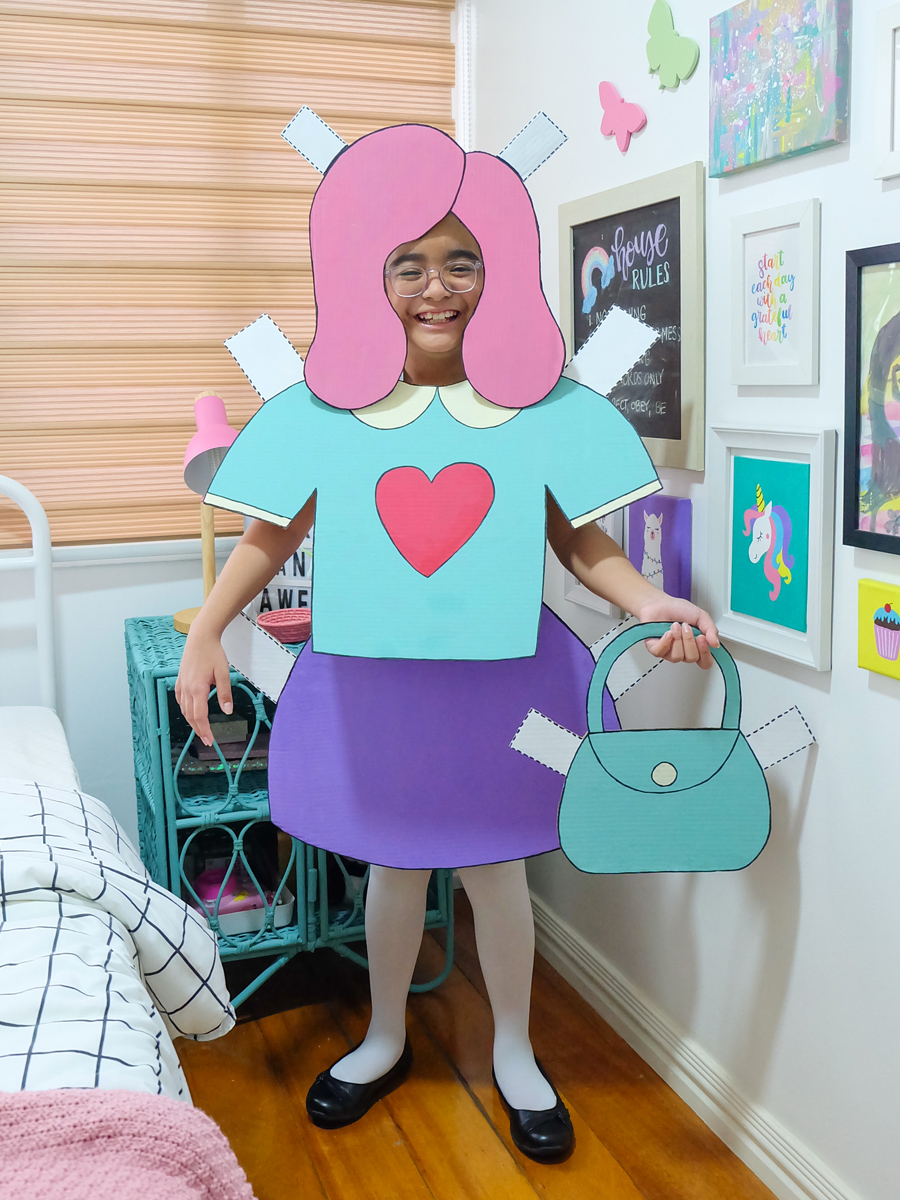 We completed the look with white tights and black shoes. Très chic! All ready and dressed to kill!
Zoë definitely approves her DIY Paper Doll Costume. She loves it from head to toe! We adore it, too. We reckon she looks like an absolute doll! 
 Check out our other DIY costumes:
]]>
Check it out!
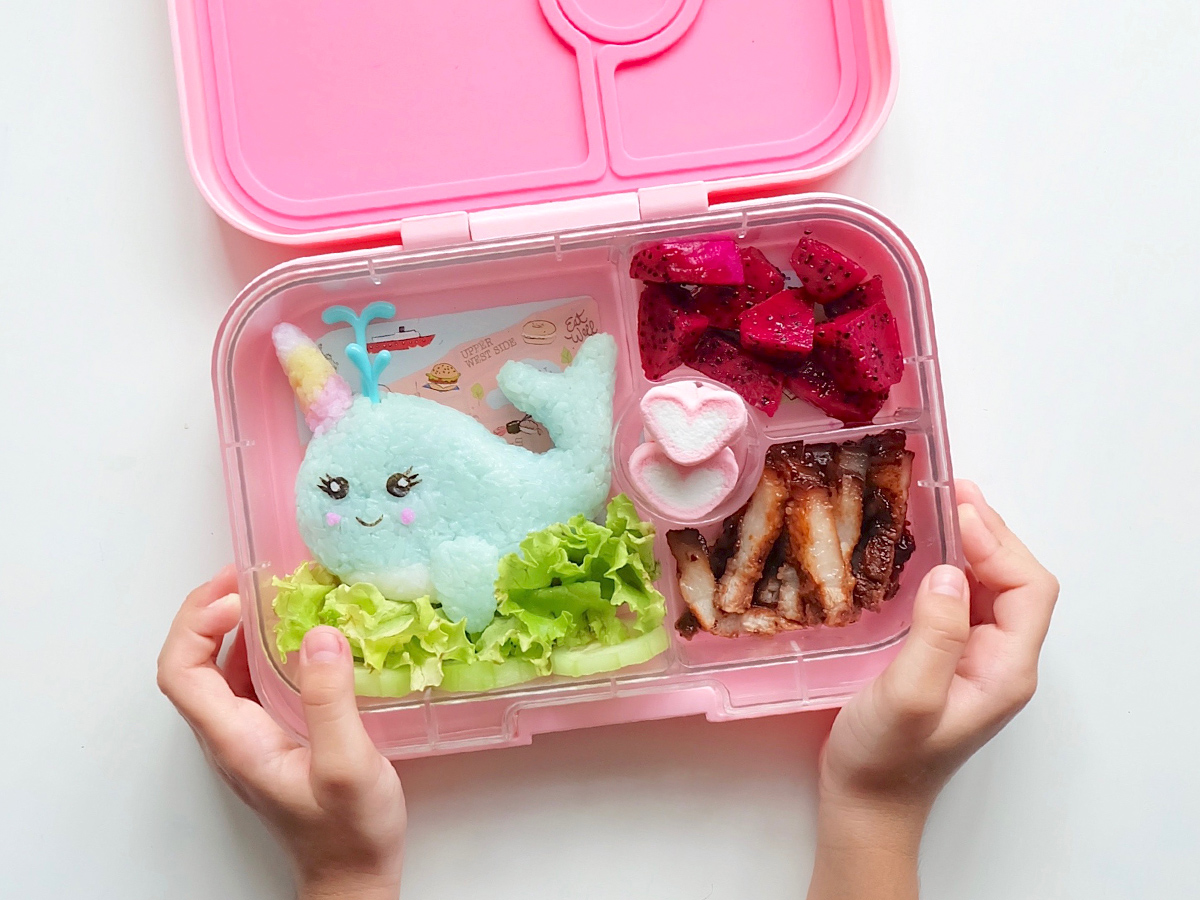
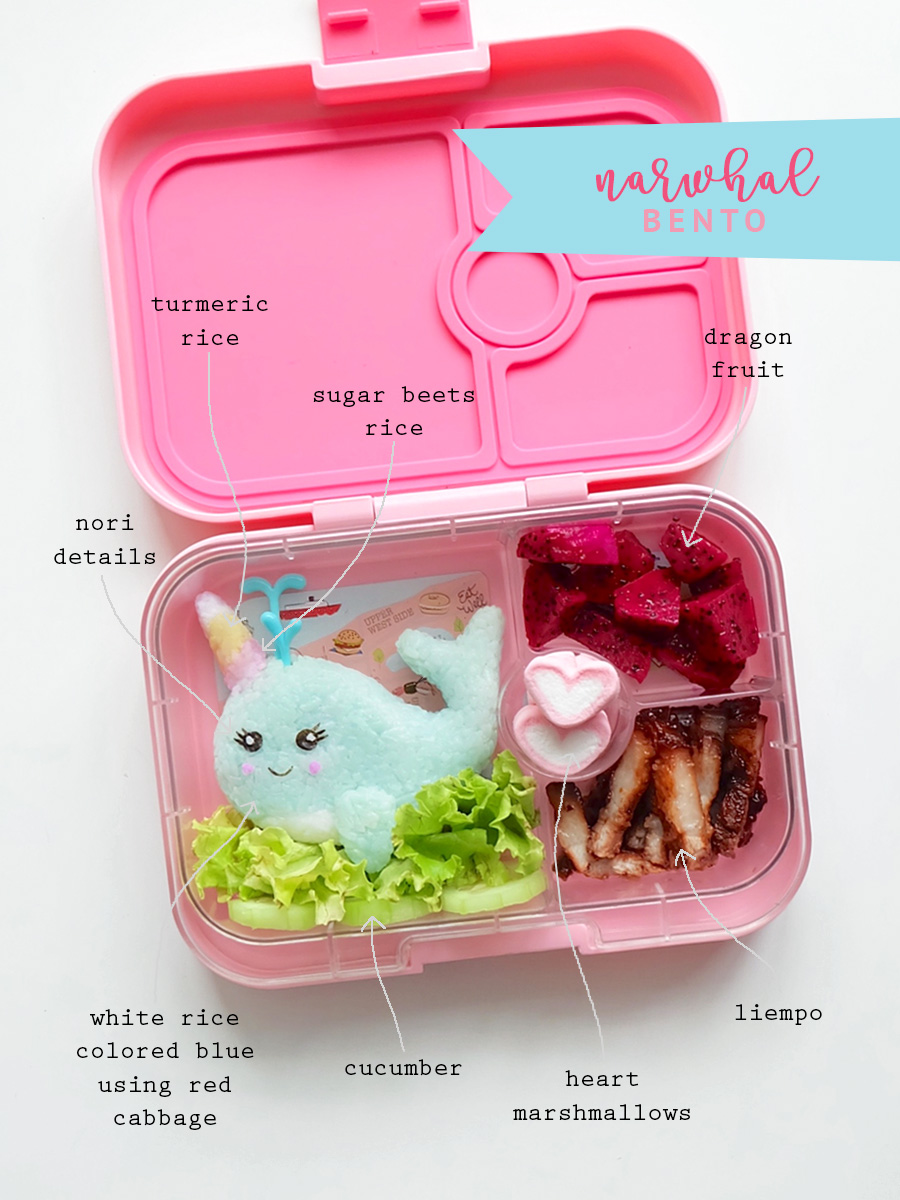 Zoë requested something adorable for her baon, so it was time to bring out the narwhal.
I shaped the body by hand using white rice, dyed blue using red cabbage. To make the colorful horn, I used turmeric rice, and sugar beets, then used nori to make the eyes and mouth details. Swimmingly delightful!
In the other compartments, I added liempo, cucumber slices, dragon fruit, and heart marshmallows. Narly and yummy!
For more of my food art and bento creations, check out #foodartbyannings on Instagram.
]]>
Check out the Little Outrageous Little inside her Yumbox!
 Rise and shine! Say Hello to LOL Surprise Doll Dawn!
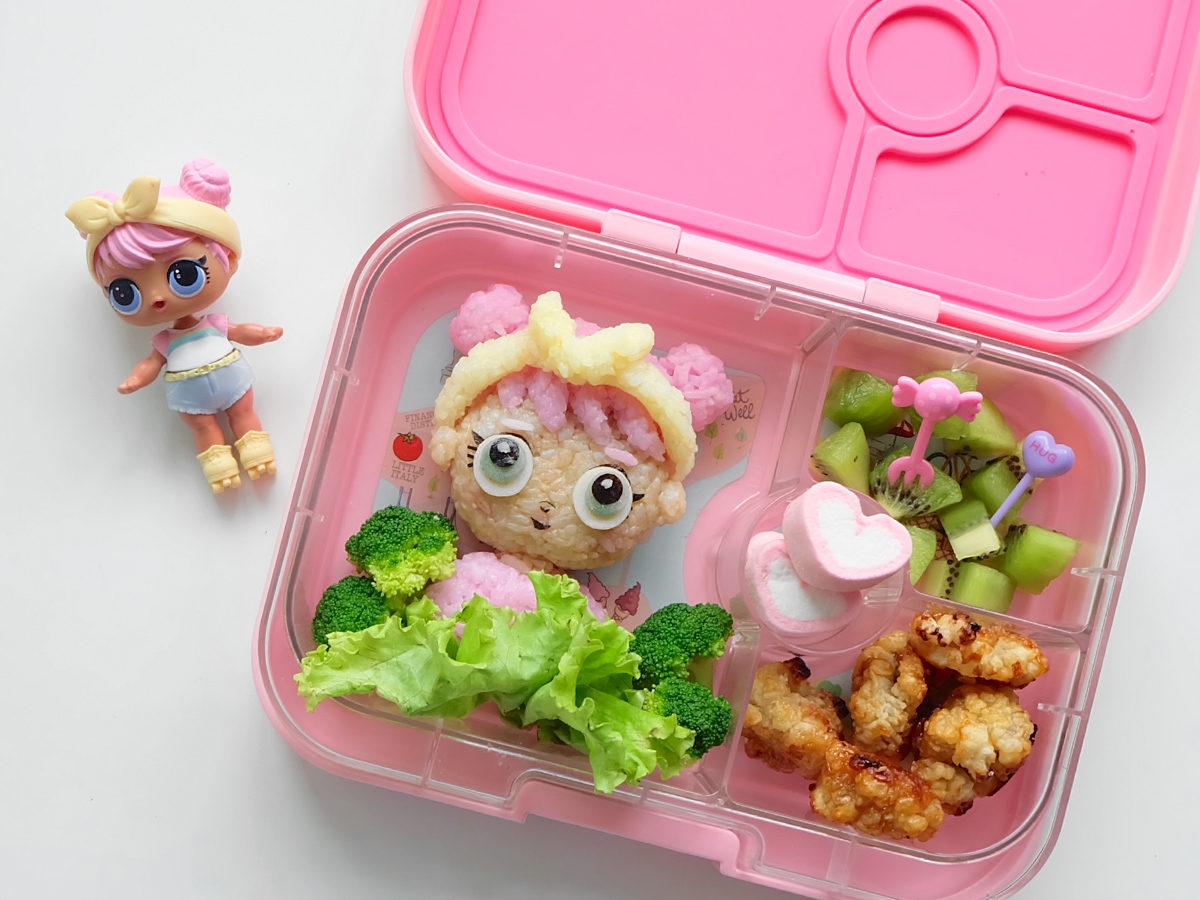
 To create LOL Surprise Dawn, I used brown rice for her face. Her pink hair was shaped using white rice mixed with sugar beets juice, while her yellow headband was dyed using turmeric. I then made her eyes using rice and the details using nori. Adorable!
Completing the packed lunch, I added orange peel chicken from Auntie Arnie‘s, broccoli, kiwi, and marshmallows. Yum! A fun and cute little meal, perfect for my Little Outrageous Little!
For more of my food art and bento creations, check out #foodartbyannings on Instagram.
]]>To celebrate, I made a quick bento for Zoë’s lunch at home today. Check it out!
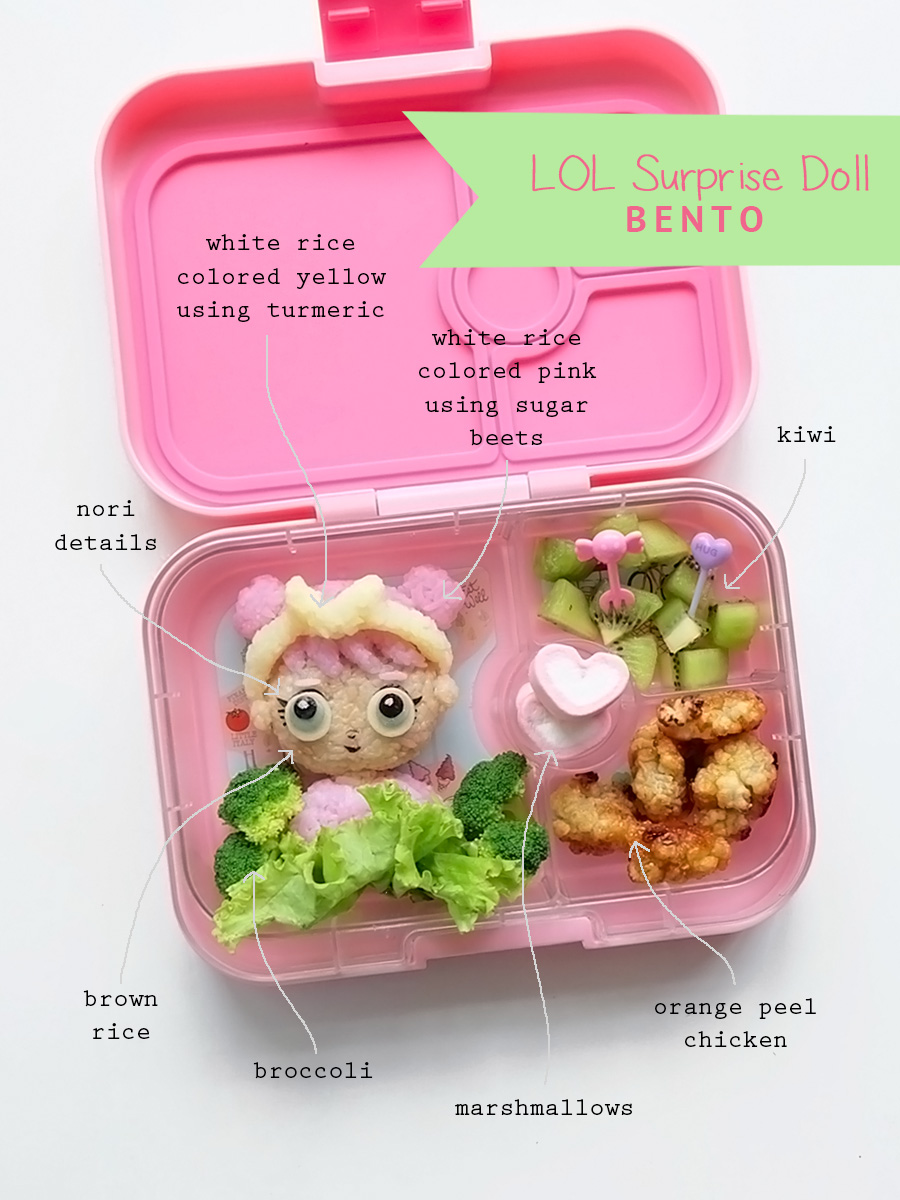
To start off, I gave the girl’s face a light brown color by mixing white rice with a bit of adobo sauce. Her body is colored pink using white rice mixed with beets juice. I then used nori to make her hair and her face details. To make her Independence Day ready, I gave her a small Philippine flag attached to a food pick.
For protein, I added the Philippine’s unofficial national dish and Zoë’s favorite: pork adobo. To complete the meal, I filled the other yumbox compartments with broccoli and grapes. Yum!
For more of my food art and bento creations, check out #foodartbyannings on Instagram.
]]>Check out how I made this colorful meal.

I always use natural food coloring in my food art to ensure Zoe’s meals are as healthy as possible. For this unicorn bento, I used turmeric and red cabbage to make yellow, blue and pink coloring. Making each color is pretty easy and takes very little time, too.
To Make Natural Food Coloring:
Yellow: Add a little bit of turmeric powder to warm water. Mix until you reach desired yellow color.
Blue: Slice and boil a bunch of red cabbage leaves in water until liquid turns reddish purple. Strain out the cabbage. Take the colored liquid and add a pinch or two of baking soda until it turns blue.
Pink: Using the same reddish purple liquid from the boiled red cabbage, add a few drops of lemon juice until color turns pink.

The unicorn’s head and ears were shaped using plain white rice. The colorful mane was made by mixing white rice with the natural pink food coloring and the blue food coloring, then shaped onto the head. For the horn, I mixed a little bit of the natural yellow food coloring with rice. To finish off the unicorn, I used nori for the eyes and mouth, and added a tiny pink marshmallow on the cheeks.
To make a complete meal, I added chicken nuggets, slices of carrots, and kiwi. Healthy, colorful, and yummy!
With this fun unicorn meal, eating the rainbow couldn’t be more magical!
For more of my food art and bento creations, check out #foodartbyannings on Instagram.
]]>
 The bento-making workshop, held at Rustan’s Makati, was conducted by none other than Kat Maderazo of Bento by Kat.
I’ve been creating food art and character bentos for Zoë since she was two years old, but it was a treat to be able to sit down and learn a thing or two from the country’s very own bento guru. Zoë was also thrilled that she got to make her own packed meal. She enjoys watching me work on her school baon, so she was happy to be able learn how to do it, too.


Kat taught us how to mold and shape an alpaca with rice. See how focused and delighted Zoë was during the workshop? She really got in on the bento-making. She listened intently to the instructions, and made sure we followed everything to a T.

Our finished product: The cutest baby alpaca! We shaped and made the alpaca’s body and tail using white rice mixed with a bit of soy sauce to give its light brown color. For the face we used flattened white rice, nori for the details, and a dot of ketchup on both cheeks to give it a rosy glow. We wrapped two tiny balls of rice in nori to make the hooves, then cut two small carrot triangles for the ears, and used red bell pepper for its bow. To make it a complete meal, we added some chicken nuggets, grapes, broccoli and star-shaped carrots, too. Yum!


Super proud of her baby Alpaca, Zoë couldn’t hide her excitement!


We packed our alpaca bento inside Zoë’s new yumbox panino from BrightBrands PH. The yumbox panino in gramercy pink came personalized with her name, too! Zoë adores it! We reckon the decal stickers, designed and made by Sticky Business MNL, looks absolutely adorable. Enough to bring some sunshine amidst the gloomy Manila weather the past few weeks!


Refreshments were served in the form of some happy food by The Bunny Baker. The table, filled with delicious corndogs and pink lemonade, kept Zoë going back for more. They were really good!

To get us ready for the school year, BrightBrands PH and their partners armed us with these personalized essentials:
- Yumbox Panino from BrightBrands PH.
- Decal Stickers by Sticky Business MNL.
- Spoon and Fork Set by Design And Engrave.
- Insulated Lunch Bag from Esheart PH.
- Swell Bottle from Rustan’s.

Photo by Spark Studio.
Cheryl Sy, the brains behind BrightBrands PH. She formally ended the workshop by thanking us for helping share the word about the yumbox, but really, we are just as thankful to her for bringing to our shores the joy of preparing food for our little ones.
Thank you Cheryl and BrightBrands PH for the fun afternoon! Zoë and I had such a lovely time bonding over two of our absolute favorites– bento-making and the yumbox.

With the happy moms and little ones during the workshop. Photo by Spark Studio.
Would you like to learn how to surprise your little ones with the cutest bento creations, too? Follow BrightBrands PH and watch out for their future workshops. Your kids will love you more, promise!
Bright Brands PH
Facebook: https://www.facebook.com/BrightBrands.ph
Instagram: @brightbrands.ph
Email: [email protected]
Bento by Kat | Rustan’s | Sticky Business MNL
Esheart PH | Design And Engrave | The Bunny Baker
]]>
Check out what hopped inside the Yumbox!
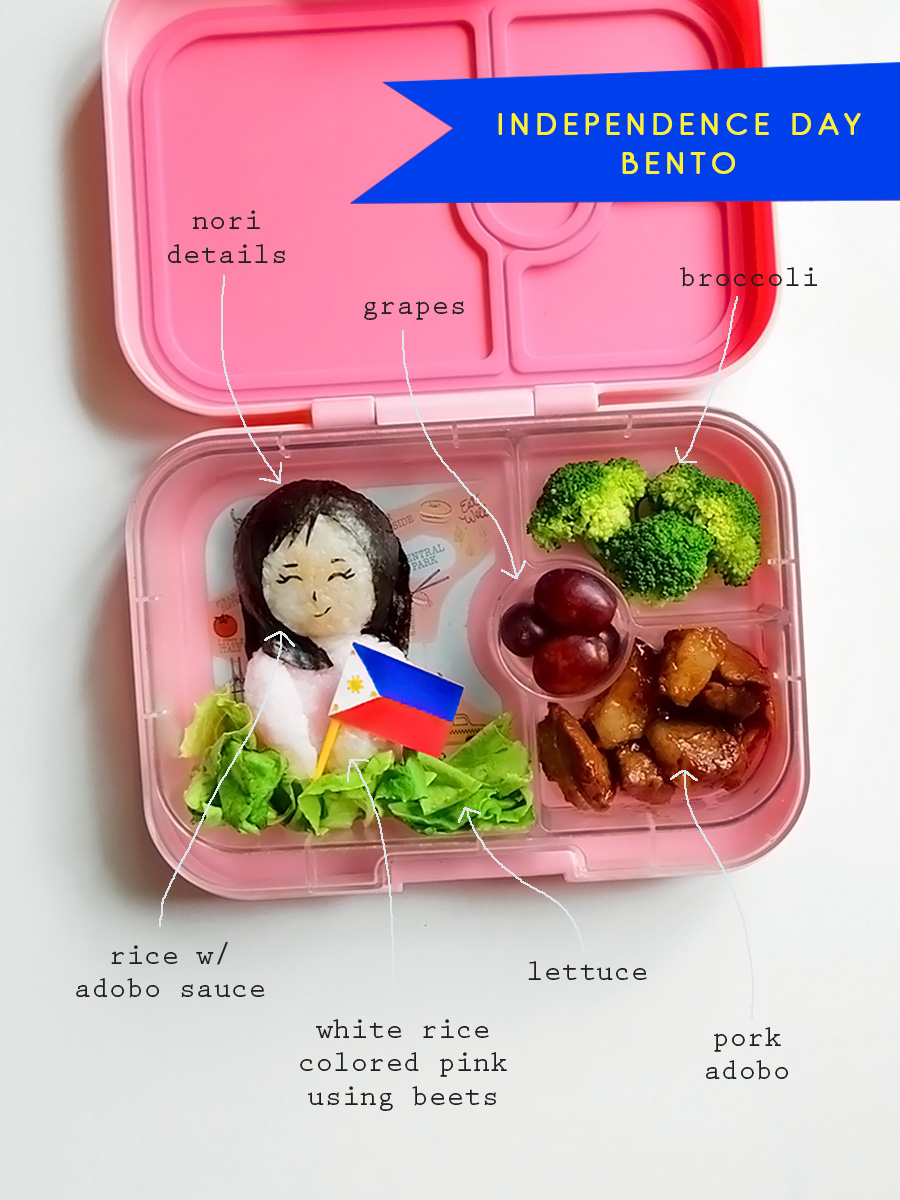
The rabbit’s face, legs and ears are all shaped using white rice mixed with Adobo sauce. You may simply use brown rice, too. The cheeks are white rice formed into two tiny balls. I then cut ham for the nose and both ears, and used nori for the eyes and the whiskers. To finish off the bunny, I cut and shaped a tiny slice of carrot and attached it to a leaf-shaped food pick.
To make a complete meal, I added Pork Adobo below the rabbit, and filled the other compartments with ponkiat, cucumber slices, and edamame. Yum!
For more of my food art and bento creations, check out #foodartbyannings on Instagram.
]]>With Halloween coming in two weeks, it’s time to up your lunch-packing game. Make your little one’s school day ghoulishly good by adding a spooky surprise inside their lunchbox. Here are a few freaky bento ideas that are to die for!
 Ghosts, mummies, witches, monsters and graveyards, I’m sharing some of my bento food art creations that are perfect for a little scare.

Green Little Frankie made an appearance in this not-too-spooky lunch. The Frankenstein onigiri is made of rice, mixed with some pureed green peas, and nori for all the details. I packed it inside the yumbox with some lechon kawali, carrots, cucumbers, pretzel sticks, and then finished it off with some sour gummy candy strings.

Boo y’all! A simple ghost sandwich, with cheese on top and nori for the details. I also filled the snack box with some crackers, pretzel sticks, and marshmallows.

The Wicked Witch of the West! I blogged the details of this avocado snack plate HERE.

A Mummy Sammie! A simple round Nutella sandwich, with nori and white bread for the eye details, and strips of cheese for the mummy wrap. I finished it off with some pretzel sticks and grapes, paired with some spooky eye picks. Just enough cuteness to keep the fright away!

A ghostly graveyard for this fa-boo-lous snack box! Nutella coffin sandwich over a bed of cucumber strips, ghost marshmallows, pretzels, and some sour gummy crawlers. Creeeepyyy!

Who said all witches were bad? This adorable witch has some yummy spells brewing inside this yumbox lunch. Witch onigiri made of white rice, nori, cucumber strips, and ketchup. I packed her with some herb-crusted chicken tenders, carrots, cucumbers, kiwi, and some sour gummy crawlers.
Ready to give your kids a spooktacular lunch? Try any of these lunchbox ideas and treat them to a fang-tastic meal! Go on, these creepy yummies will disappear like magic, for sure!
]]>Our criteria for the perfect lunchbox? Durable, compact, colorful, kid-friendly, leak-proof and one that would make packing food easier. We checked out several different containers, but there was only one that fit the bill– The Yumbox!

The Yumbox is a leakproof, bento-style lunch container that teaches kids healthy eating habits through balance and portion control. It is compact, lightweight, and durable, made with all food-safe materials.
We got our yumboxes from Brightbrands PH, and we are totally in love with them!

The Yumbox Panino
The Yumbox comes in a variety of sizes and compartment options. For Zoë’s packed school lunch, we chose the Yumbox Panino. It has 4 pre-portioned illustrated compartments, its size, just perfect for packing a full and healthy meal. The compartments are awesome, as each one serves as a guide for portion control. I can easily fill up each space with healthy varieties.

I regularly make character bento (charaben) food art in Zoë’s packed meals, so the Yumbox Panino, with its bigger compartment on the left, gives me plenty of room for creativity. It’s so versatile that I can easily move food around the different compartments, depending on the design I want to create and the food that I want to serve.
For this Yumbox lunch I prepared Zoë an owl rice onigiri, herb-crusted chicken tenders, mangoes, carrots, green beans, and a side heart marshmallows.

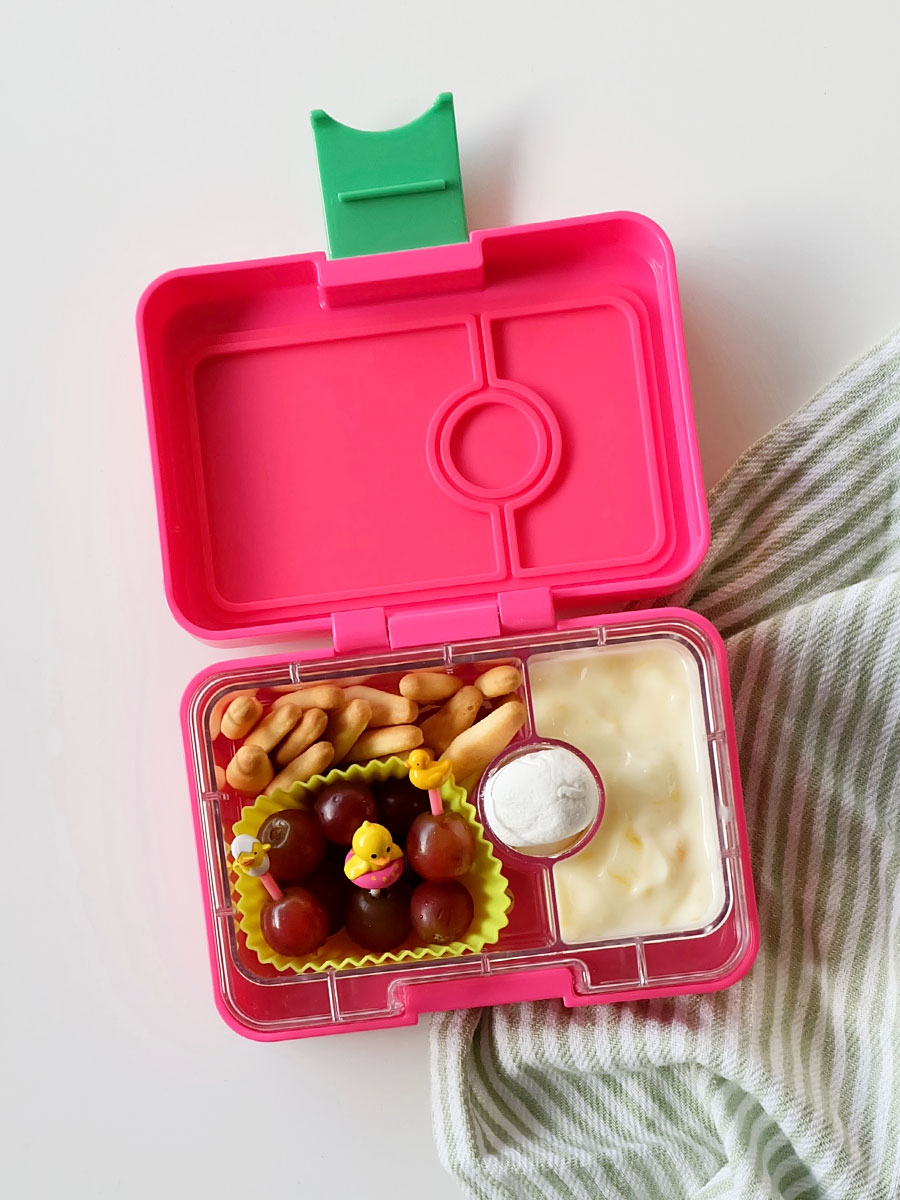
The Yumbox MiniSnack
For Zoe’s 15-minute snack break in school, we use the Yumbox MiniSnack. It’s considerably smaller in size, with 3 smaller compartments, but it’s deep enough that you won’t have problems packing it with options. For this snack, I was able to squeeze in a peanut butter sandwich cow, ponkiat, strawberries, and some pretzel sticks.
What I love the most about the Yumbox is that the containers are leakproof. Yumbox’s unique single lid seals all food wells individually. I can finally pack yogurt together with Zoë’s other snacks, without worrying about spills! No mess!

Food really stays in place inside the Yumbox. I never have to worry about food spilling over into the other compartments. For sauce lovers, that means you can also add sauces and dips into the smallest food well, with no worries!
I also love how colorful the containers are. We have Yumbox Panino containers in both Kawaii Pink and Bijoux Purple, and the Yumbox MiniSnack in Cherie Pink; the bright colors really add excitement to each packed lunch. Just look at how fun the meal looks!

Even when I don’t make character bentos, meals still look pretty fancy inside the Yumbox.

And its so pretty, even the husband wanted his own Yumbox packed lunch, borrowing Zoë’s Panino in Kawaii Pink! Who says pink are only for girls? Heh!
 The Yumbox containers are BPA-free and phthalates-free, so they are definitely safe for kids meals. They are lightweight and compact with a latch that’s easy to open, even for my little girl’s tiny hands. Plus points for their detachable trays, because it makes them easy to clean, and they can even be mixed and matched!
 We love everything about the Yumbox, but the best part of all? Seeing the delight in my daughter’s eyes every time she sees her packed meals!
The idea of having a selection food to choose from inside her lunchbox really excites her. She enjoys her meal times in school, and she has been coming home with empty containers! Sigh! Seeing my little one happy? That’s all it takes to keep my mommy heart full! Thank you, Yumbox! Thank you, Brightbrands PH!


 Want your own Yumbox? They are available in the Philippines through BrightBrands PH (email them at [email protected]), or you may find them at Rustan’s Department Stores.
Bright Brands PH
Facebook: https://www.facebook.com/BrightBrands.ph
Instagram: @brightbrands.ph
Email: [email protected]